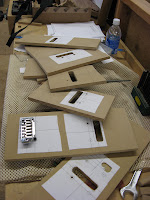
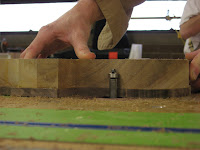
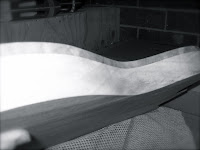
In this film you can see the rough process of making a hollow body without bending the sides on an iron. Jigs have been set up to route pieces of the body leaving a 5/8 inch side. At the end of the film, "clamp and glue" the back plate has been glued to the newly formed hollow body.
Saturday, February 28, 2009
Friday, February 27, 2009
Roy's Guitar, Waiting for Delivery
Roy and I are communicating back and forth until we nail down a headstock design for his guitar. This is definitely an important visual component to the instrument so we don't want to rush it (pictured with designs all over). An order was placed the other day for carbon rods (picture). These will be put into the neck as re-enforcements to the truss rod. In the diagram you can see where they be in relation to the truss rod. These rods are super light and super strong. Hopefully, these rods will help the wood resist the temptation to move or shift as the instrument moves from one climate to another. They should arrive next week.


Thursday, February 26, 2009
Rufus, P.H.D., Chapter 4
The African Mahogany top plate and back plate were re-sawn, joined, planed and glued. When you re-saw a board it is pretty cool because it opens up like a book, hence the phrase, "book-matched." A mirror image. In the picture you can see this effect. Also in the picture is a jig which will be used for hollowing out the body. Once that is finished I can glue these two plates to the guitar. Sometimes when you spit a piece of wood from a tree that grew in Africa you stare off into the horizon, and wonder... 

Wednesday, February 25, 2009
Rufus, P.H.D., Chapter 3


The two piece mahogany body was glued up the other day. With this dry a template of the guitar was traced onto the wood. The bandsaw made quick work of cutting out the rough body. This is going to be a hollow-body electric with a carved plate on top and on the back. The next step will be to hollow out the body inside and out, then sand and smooth it down.
Tuesday, February 24, 2009
Rufus, P.H.D., Chapter 2


This weekend I sat down and drew out, to scale, Dr. Rufus's proposed instrument. With the calculated board feet of mahogany necessary for the neck and body in hand, I took a trip to the wood store (picture). The African Mahogany looks great! This is a great wood to work with. It is light, beautiful to look at, strong and begs to become an instrument. The main body of this instrument will be planed and joined hopefully today.
Saturday, February 21, 2009
Roy's Guitar, Chapter 12


The three piece maple neck has been planed, joined and glued together (picture 1). An angled headstock has been chosen for this guitar. I have a nice rosewood veneer head-plate which will adorn player's side of the guitar (as chosen by Roy). An angled headstock will help to facilitate the joining of this veneer and creates a smooth transition between fretboard and headstock.. This type of joint is called a "scarf joint." I first cut the angle where the headstock begins (picture 2). Then clamp the shorter piece to the longer piece and plane/block-sand the newly formed angle flush and square (picture 2). The final step is to clamp and glue the two pieces of wood together forming what will eventually be the headstock of the guitar (picture 4).
Friday, February 20, 2009
Roy's Guitar, Chapter 11 continued

Today the humbucker pickup slots were routed. With this complete the next task is to route the control cavity, where the master volume knob, three-way selector switch and input jack will be housed. To Roy's specifications I will put these far to the bottom right side of the guitar (holding it looking down). This will hopefully accommodate heavy shredding without knobs getting in the way. I have begun to think about the neck. Three piece flame maple joined with Indian Rosewood (Roy's Choice) should make for a great duo.
On a side note I just received Brainchild's latest album, One Word, it is a product of creativity and imagination. Thanks ya'll! So you folks out there who like great music go and get one! (www.brainchildjam.com/)

Thursday, February 19, 2009
Roy's Guitar, Chapter 11


I worked out the bugs and was able to route the tremolo tailpiece system into Roy's guitar. I modified a routing fixture to accommodate the tailpiece by adding a little shim here and there. Using a router and flush cut bit I copied the design from the plastic template to the guitar. Next the pivot posts (which are supports for the tremolo) will be drilled.
The tremolo system is like a seesaw, there is tension from the guitar strings and tension from springs mounted the the cavity underneath (picture). This allows the tailpiece/bridge to pivot up and down by a "whammy bar" or rod that screws onto the unit. Next I will route the cavities for the humbucker pickups.
Roy's Guitar, No New Chapter

I ordered a cool tremolo unit, made in Interlaken, NY and routed some test fixtures based off their schematics. Funny how the company's own templates are completely wrong. If I were to put this unit in according to their information the tremelo would be off-centered and unacceptable. So in order to remedy this correct fixtures have to be manufactured. This is a slow process, lots of trial and error. After about 7 hours and lots of MDF (the brown board you see in the picture) I just about have it. Once the final routing fixture is made I can route the cavities which will accept the tremelo unit. Then I will send the Company my template so this won't happen to other builders.
Wednesday, February 18, 2009
Rufus, P.H.D., Chapter 1
Sunday, February 15, 2009
Roy's Electric Guitar, Chapter 10
The binding strips have been glued in place. I clamped the guitar body firmly to the table so as to apply a lot of pressure without it moving. I applied the super-glue to about an inch or so of binding, held it in place, then sprayed the accelerator (dries glue). Pictured are some of the items used for this job.

There is much clean-up after this step. First the body was sanded with an orbital sander. This removed most of the glue. Then finished up by hand. The next step will be to rout cavities for humbucker pickups and tremelo tailpiece.


There is much clean-up after this step. First the body was sanded with an orbital sander. This removed most of the glue. Then finished up by hand. The next step will be to rout cavities for humbucker pickups and tremelo tailpiece.

Saturday, February 14, 2009
Film: Bending Binding, Chapter 9
In this video an iron is used to stream the bindings into submission. Bending wooden binding is tough and frustrating. I made four bindings and already broke two. In this video the binding is being shaped and taped to the body. Later, the bindings will be super glued in place a few inched at a time. The green hollowbody electric seen hanging on the wall in this film is the instrument you hear in the music.
Thursday, February 12, 2009
Roy's Electric Guitar, Chapter 8

In order to make way for the binding a channel or ledge was routed into the body of the guitar. The thing you have to make sure of is that the body is clean before routing. If there is any glue or a bump the unconformity will be transfered by the router bit to the guitar. With this complete the next step will be to bind the body.

Wednesday, February 11, 2009
Roy's Electric Guitar, Chapter 7


In an earlier blog I decided that we would bind the guitar body using maple as I did the f-hole. Today, to add some contrast a fine line of walnut was glued to the maple binding. The maple bindings were stood upright, glued and clamped to the walnut veneer (picture). A veneer is a very thin piece of wood, like paper. I then cut the bindings free from the veneer and sanded the edges flush so that the two pieces of wood are now one. The finished binding (picture) awaits the the guitar's body.
Roy's Electric Guitar, Chapter 6
Tuesday, February 10, 2009
Roy's Electric Guitar, Chapter 5
Yesterday, the f-hole was bound. I used maple for this as I will do for the body binding. Using special iron for luthiery (basically a electric hot pipe, with an alan wrench stuck out the top for bending small items) , the wet maple was shaped to match the f-hole with the steam created by the iron and water. Then was glued in place with super glue. Strong tape, like filament tape, is necessary to pull the binding strip into place against the top plate. The bound f-hole is made up of four pieces of maple strips. After it was bound it was time to sand flush with some 100 grit sandpaper (the picture).


With the f-hole bound, the inlay in the body completed it was time to glue the walnut top to the mahogany body. First, Titebond Wood glue was applied with a roller (small rolling-pin with a handle) to the body surface. I put blocks underneath the body to elevate it off the table so I could get the clamps underneath it. The old routing fixture jig (pictured on a previous blog) was placed on the walnut top (to protect it from the clamps digging into the wood). About twenty clamps did the trick (picture).


With the f-hole bound, the inlay in the body completed it was time to glue the walnut top to the mahogany body. First, Titebond Wood glue was applied with a roller (small rolling-pin with a handle) to the body surface. I put blocks underneath the body to elevate it off the table so I could get the clamps underneath it. The old routing fixture jig (pictured on a previous blog) was placed on the walnut top (to protect it from the clamps digging into the wood). About twenty clamps did the trick (picture).

Saturday, February 7, 2009
Roy's Electric Guitar, Chapter 4


I got a couple things done today: The picture shows me doing some pearl inlay inside of body. This will be visible when you look in the f-hole. First, I decide what I want to inlay, then I glue the paper cut-out pattern onto a piece of mother of pearl. Next, use a jeweler's saw with a fine blade to cut the pearl. Finally, I use a dremel router to create cavity in the wood which will accept the the pearl piece. Glue it in with epoxy, let dry and sand flat.
I also worked on filing and sanding the f-hole on the walnut top for Roy's guitar. Some folks have asked some questions about certain terms for guitar parts so I will give a little explanation for those. The f-hole, not related to the a-hole, but if you imagine a violin or cello it is the shapely holes seen on either side of the bridge piece. Soon, the single f-hole on Roy's guitar will be bound and the top can then be glued to the mahogany body. I threw a picture of a f-hole for a visual.
Friday, February 6, 2009
Roy's Electric Guitar, Chapter 3


After I joined, planed and glued up the mahogany body wood I traced my templet onto it and cut it out. Roy would like a f-hole put into the upper bout (see his design from previous blog) so I have chambered out the body first using a drill press (see picture) and then using a router with pictured jig I made for this purpose. You can see the finished sound chambers in the second photo.
The walnut "drop-top," which is a thin piece of wood (about 3/8 in. thick) will go on top of the body. It was successfully cut yesterday. I say successful because you can loose a lot of wood during the re-sawing process. This piece of walnut is amazing! The figure in the this piece swirls, moves and has a lot of character. It is so nice that I have made the decision not put laminates through the body as on Roy's drawing, but instead will bind the f-hole and body in maple to achieve some contrast. I will not post pictures of the walnut top because I want it to be a surprise. I am really happy with it!
Wednesday, February 4, 2009
Marshwood Guitars Delivered First Custom Order This Past Christmas!


Josh Barber (www.barberstudios.com/), a long time friend (and customer) received his Marshwood Custom Hollow Body Electric over the Holidays this past year. This one, a year in the making, features a 17" lower bout, carved maple top and back mahogany/maple neck, ebony fretboard and surprise inlay dedicated to the Fine Art achievements of Joshua Barber.
"Five Books," a series of iconic figures which told stories of the Old Testament was shown in Richmond, Virginia in 2005. I was one of the lucky people to be there and see such an incredible collection of fine art from one artist under one roof. The inlay I put in the headstock of his guitar is one of these iconic beings from this show.
I purchased my first Barber fine art piece in the fall 2000. This was his first sale. It was a piece, which I believe, was the beginning of this creative path. It features a guitar player, set in blue stonework, with a gold leaf halo around the figure's head. It is only fitting, that eight years later he is my first customer. Thanks Josh!
Roy Ponce's Electric Guitar, Chapter 2


Took a trip to the Hardwood Supply store in Denver and found some nice African Mahogany (for the body), and some Walnut which will be used as a "drop-top." I like this store because they allow you to cut boards to length instead of having to buy the entire board. I 4-squared (join, plane) the mahogany board and glued it up. The walnut board is going to be a challenge to work with. I find you lose up to 30%-40% of of a board when you want to re-saw, join and plane it, so hopefully all will go well and I will have enough to work with.
Tuesday, February 3, 2009
Roy Ponce's Electric Guitar, Chapter 1


Roy Ponce, a fantastic guitarist for the rocking mid-western band Brainchild (www.brainchildjam.com/) and Colorado's Marshwood Guitars have been brought together to create a one-of-a-kind instrument. Working from Roy's specifications and drawings this Jaguar influenced guitar is going to be fun to build. The challenge is going to be to capture the essence of the Jaguar and yet make it independent of its roots as well. The first step in the process is to find some full-scale plans. The next step is to draw a full scale model with the alterations to scale length, nut width, etc. I have also priced out all of the materials necessary: electronics, fret wire, hardware, etc. Once I have a good idea of what I want to do and what I need it is time to go find some wood.
Labels:
Brainchild,
Marshwood Guitars,
Robbie Marsh,
Roy Ponce
Sunday, February 1, 2009
I met Mr. Bob Benedetto this weekend!

This past Saturday the luthiery program at Red Rocks Community College had an awesome surprise. Bob Benedetto (www.benedetto-guitars.com/), world-renowned archtop guitar builder was in town studying French polishing finishing techniques with luthier Robert O’Brien (www.obrienguitars.com/) and visited the college's shop.
Mr. Benedetto spent the entire morning with us. This was especially a treat for myself, and the students taking my course in archtop guitar construction. Mr. Benedetto is a wealth of information and was happy to answer our many questions. It was incredible!
Subscribe to:
Comments (Atom)


