Wednesday, March 25, 2009

The Rufus, Neck Pocket


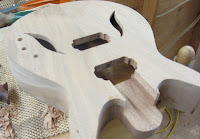
The same neck pocket preparation process is applied to The Rufus, except this guitar is to have a glued-in neck with a floating bridge which required an angled headstock. The rest of the process follows "Roy's Guitar, Chapter 16" Mike Snider (www.sniderguitars.com), a luthier and inlay artist was on hand to lend his expertise. Notice the care in wearing protective gloves during the guitar's procedure.

Roy's Guitar, Chapter 16

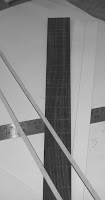
Neck pocket preparation can be stressful, if mistakes are made now it could really set you back. In the picture you can see a straight edge lined up on the center line of the neck. This is moved around until it matches up with the center line on the body. The neck is then clamped to the body. The part of the neck that is to sit in the body is etched with a blade onto the top of the body. The neck is then moved to the side. A routing fixture is then clamped to the body, the metal guides of this fixture are lined up with the lines that were etched before. This is then routed to the proper depth (picture). The neck does not fit yet (picture) but with patience and care it should fit like a glove.


Wednesday, March 18, 2009

Roy and Rufus Necks, continued


After the headstock and neck taper were complete the rear of the headstocks both received veneers. Roy's a walnut and Rufus's ebony. These continue the themes established earlier in our wood choices. The rear of the headstocks were sanded and prepared. Each thin veneer was glued and clamped to the headstock. When gluing veneers I have found it useful to use a very small amount of glue. If too much is applied the veneers will bubble up. Now both of these necks are ready to be inlayed with pearl.

Sunday, March 15, 2009

Roy and Rufus Neck Tapering

Yesterday, some tapering of the headstock and neck was done using a Wagner Safety Planner and drill press (picture). This tool allows one to plane down one surface (back of the headstock) to match the other (veneered player's side). You can also use this tool to taper a piece of wood. In the second picture you can see a jig to the right. This piece of oak has a taper to it, and this is what I want the guitar neck to have. Again using the Wagner with the neck taped to the jig I run it under the planner until i have my desired thickness. You can see in the picture that one end of the neck is thicker than the other. This is what I want.


Friday, March 13, 2009

Film: The Story of Two Necks

In this film you can get a glimpse of the process of building the headstock jigs, routing the headstocks and then flush routing the neck to the fret-board. Both Roy and Dr. Rufus's future guitar necks are featured in this film. The solo instrument you hear is a Marshwood Guitar and the sound tracks in these shorts are created in my studio (a computer, interface and synth but studio sounds better). Look to the right under "Marshwood Guitars on Film." Made some headway today!

Rufus, P.H.D. Head Plate Veneer

With the fretboard on, the next step was to glue on the ebony head plate (1/8 inch veneer). First a truss rod access was chiseled, filed and sanded out (picture). Then glue was applied to the head stock. You have to be patient with the glue during this process. The ebony head plate wants to slide around on the glue and if you clamp to quickly the truss rod access will not be lined up how you intended. After waiting a few minutes I clamped it down (picture). Once dry,the excess ebony is trimmed away . A truss rod cover plate will be made out of this extra wood. Rarely does extra wood go to waste, you can always find a use for it. And should try too (soapbox).


Wednesday, March 11, 2009

Fretboards + Necks = A Step Closer

Both Roy's and Dr. Rufus's fretboards have been bound. Roy's with a maple/walnut combo and Dr. Rufus's in ebony (color picture). Today it was time to glue the fretboards to the neck blanks. First, I matched the center line on the fretboard to the neck blank, then the fretboard was temporarily clamped and two wire brads installed (picture). These will act as a guide making it easier to find the correct placement once glue is applied. The fretboard is pulled off leaving the two guide holes created by the brads, glue is applied, then many clamps are utilized (picture). The neck blank for Roy's guitar is not wide enough to accommodate the headstock so "ears" are attached to either side (picture). Don't worry, the headstock will not be paddle sized. The next step for both of these puppies will be to glue on the headstock veneers.


Saturday, March 7, 2009

Roy's Guitar, Chapter 15, Fretboard Preparation


Today some bindings were made, these will compliment the fretboard. The binding will match the body. They are maple with a walnut line at the bottom. The next step was to cut the rosewood fretboard to its proper measurement and taper. With all the lines drawn on the board (considering the binding) a rough cut was made. Then using a table router and jig system a few passes were made leaving a clean tapered piece of wood (picture). The next step will be to bind the fretboard then glue the fretboard to the neck.

Friday, March 6, 2009

Roy's Guitar, Chapter 14, Routing the Control Cavity


A) Chose control cavity layout (home for the volume and selector switch), built the template and routed the shape into the guitar


B) Kept on routing down to the proper depth


C) This cavity needs to be covered so I came up with the cover plate design. Walnut is the wood to be used for this application, of course because the top is also walnut. I drew the design, then made a jig (template or router guide) then routed it to the correct depth, about 1/8 inch.


D) Two pieces of walnut were glued together to make a cool control cavity cover plate


E) I traced the template onto the walnut and cut, sanded and fitted the piece to fit. The tremelo system will also get a walnut cover plate.

Wednesday, March 4, 2009

Rufus, P.H.D., Chapter 7

The Rufus, P.H.D. and myself communicated back and forth until we nailed down a f-hole design. I felt this instrument needed something a little non-traditional. Once the Doctor choose the best design it was time to snap into action. The f-holes were transfered onto the top and then pilot holes drilled. The humbucker pickup cavities were routed at this time (picture). I then cut the f-holes.


With this completed I choose the toggle switch, volume and tone control placement and drilled the appropriate holes. I prepared the top plate to be glued to the body. This required some fine joining and then applying shellac to the inside. In the picture you can see the top plate waiting to be joined with clamps in the background. Once the glue was dried I flushed up the top plate with the sides of the body. The body looks thick in this picture but once the neck pocket is routed the carving will begin leaving a nice contoured guitar.


Rufus, P.H.D., Chapter 6

As in Roy's Guitar, Chapter 12, the same processes are applied this neck. This is a quarter-sawn (vertical grain) piece of African Mahogany. The scarf-joint was cut, planed and glued.


Roy's Guitar, Chapter 13

The supplies came in and we pinned down the headstock design. So it was time to route the truss rod cavity. This was done with the table mounted router (picture). The truss rod allow one to adjust the tension in the neck. It does not matter what you do to wood it will always seek to move. As if the swaying branches it once had are intrenched in its memory. The next step after this is to route the cavities and install the graphite rods. At this point I also cut the fret slots in the Rosewood. This was done with table saw and template system (picture).


Sunday, March 1, 2009

Rufus, P.H.D., Chapter 5

So far the body has been routed out and the back plate has been glued. With it dry it is time to flush up the plate to the body shape. For this a table router is used (picture). Be careful! This tool can rip the wood out of your hands and take bites out of the guitar. After using this thing again for this purpose I feel that sanding the plate flush to the body is the way to go. After this step I sanded and sealed the inside of this body with shellac. This is a good measure and will help to protect the inside from environmental factors.