Friday, December 10, 2010
Marshwood Flagship Model
After about three years of designing, trial and error(s) a "standard" model prototype is in the works. Once completed the photos and videos will follow.
Marshwood Acoustic, The Finishing Stages


After applying lacquer to the instrument and letting it sit for a few weeks the time has come to level the finish with sandpaper. Here if the coat looks good you can go on to buff. Or in this case I need to apply a couple more coats (small pits and voids). The guitar will sit for another two/three weeks and will be leveled again. Can't wait to hear this one. The close-up photo shows the detail of the flame maple.
Wednesday, October 13, 2010

Saturday, September 25, 2010
From Sketch To Reality
Been working a lot on The Rufus this week. Dressed the frets and put in the electronics. Just a few things to tight up and she is done. When building a guitar from a sketch like this the challenges run high. This has been one of the most complex designs to bring into fruition but has also been rewarding. Hopefully, Dr. Rufus will like it.


Sunday, September 12, 2010
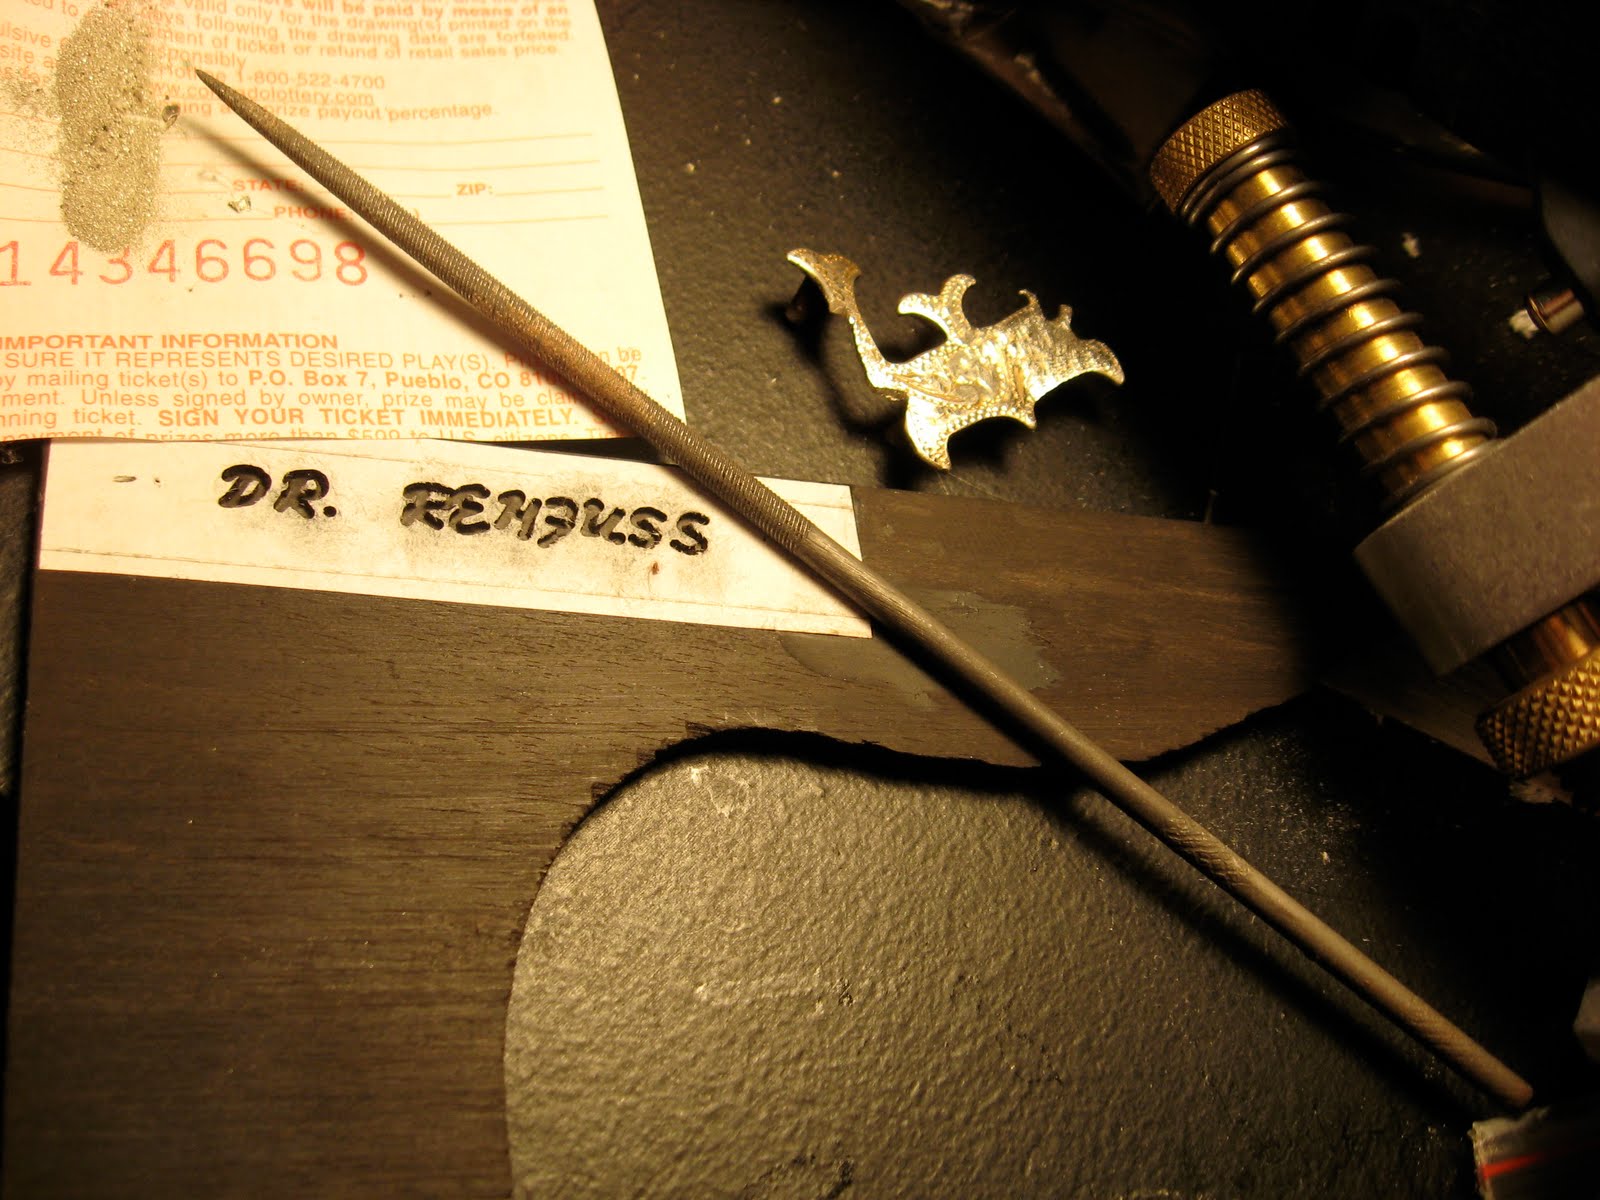
The Rufus, Truss Rod Cover Plate
The truss rod is made of steel and runs the length of the neck. Its purpose is to allow some adjustability of the neck action. One can adjust the neck tension with an allen wrench at the headstock. This hole in the headstock must be covered with a plate. This one is made of ebony and has been routed to say, "Dr. Rehfuss," the future owner of this guitar. Silver has been filed down to fill the letter cavities. Then, with the glue dried sanded off and shaped into the truss rod cover. These shots show the process:


The Rufus, Tailpiece
After designing and building a prototype tailpiece for the Rufus (which did not work) I made some changes and began again. This one is going to be both light and strong. A jig was taped to a piece of mahogany and was then cut out. I drilled holes for the future strings. To give it a matching look with the headstock, bridge, etc. a veneer of ebony was then glued to the top. Once dried the ebony was cut away leaving the rough bridge. The next step will be to shape to thickness and add some brass which will ground the strings to the endpin jack.


Tuesday, June 1, 2010
Roy Ponce and his Marshwood in action at Summer Camp 2010!


Roy Ponce rippin' his custom Marshwood with Brainchild (www.brainchildjam.com) at Summer Camp Music Festival. That's Roy jamming with Jake of Umphrey's McGee preforming the song Resolution at Summer Camp Late Night.
Sunday, May 9, 2010
The Rufus, Sanding and Buffing
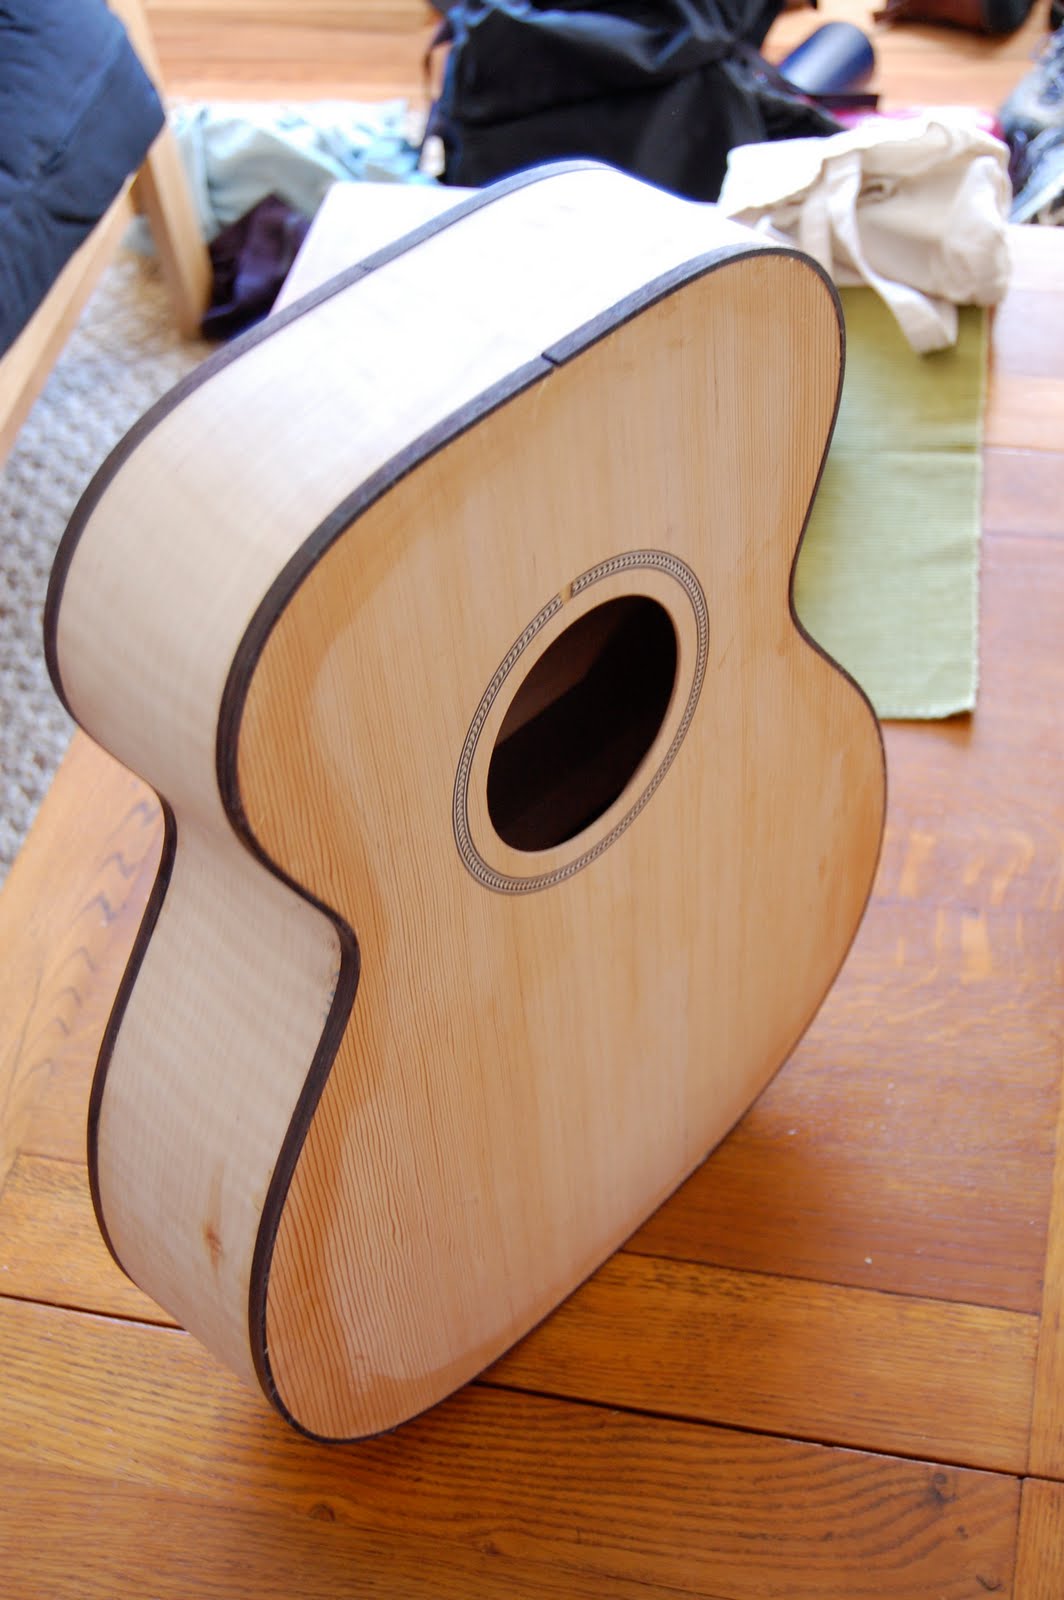
The guitar's lacquer coat has cured long enough to begin the final sanding. I started with a wet sanding of 600 and 800 grit paper (picture). At this point it was a good time to fit the bridge (picture). This was made from ebony. Once the contour of the bottom of the bridge matched the top of the guitar I buffed the instrument. So far it looks great.


Saturday, May 8, 2010
Marshwood Acoustic, Chapter 7, The Bridge


Began this process by making a template out of plywood. First by cutting out the diagram (made some subtle changes) on the acoustic guitar plans, then gluing it to a piece of .5 inch ply. I then cut this out (picture). Using two small screws I joined this to the rosewood stock, cut and sanded the rosewood flush with the template. In the picture the bridge is still very rough but that will change soon.
Thursday, May 6, 2010
Marshwood Acoustic, Chapter 6, The Neck

With radius sanding blocks I gave this fretboard a 12, 14 and 16 compound radius (More detail on radius-ing in previous blogs). After that, I used a straight sanding bar to level the board. Then the frets went in. It is starting to look like a steel string guitar. The headstock is taped for protection from bumps and bruises. The heel of the neck is beginning to take shape too. Once completed, I can focus on building the bridge.
Friday, April 30, 2010
Marshwood Acoustic, Chapter 6, The Neck
Did some rasping on the neck the other day. The first picture shows the neck in my shaping jig. On this guitar a volute was apart of the design. This decorative addition adds strength. The second photo details this area. The side position markers, were made from maple. You can use plastic, mother-of-pearl, all kinds of material for this task. I had some maple scraps left over from the back of the acoustic, so I used it. A pencil sharper was used to give the piece of maple a point. The holes were drilled and the maple points glued in (photo). The result can be seen in the last picture.


Friday, April 23, 2010
Marshwood Acoustic, Chapter 5, Body and Neck
Of course on the blog it seems these different stages go quickly but much time is spent every step of the way. The first picture shows a piece of sandpaper sticking out of the neck joint. This is put in and tugged out until the seam is acceptable. Sometimes you have to take off more on one side to get the center lines on the neck and body to match up. In the second picture the neck has been bolted on and the fretboard clamped to the neck. Everything is lined up a triple-checked. It is time to glue the fretboard to the neck (third picture). The next day I flushed up the neck to the fretboard and the routed the headstock (fourth picture).


Sunday, April 18, 2010
Marshwood Acoustic, Chapter 5, Body and Neck


With the neck roughed out and marked (center lines, nut location, 14th fret) it was time to route the tenon which will join the body. The body too was routed but with a mortis. These were both done using jigs made for this purpose. The next step will be to fit the heel of the neck to the body. This will be tough and time consuming. As you can see by the picture the future headstock looks uneven on one side. This is because it will have six-in-line tuners, not three on each side. No very traditional for a steel string, but Fender has made some acoustics this way in the past. I will use the same headstock pattern I designed for "The Rufus."
Friday, April 16, 2010
The Rufus, Cure Time


The last coat of clear was sprayed on today. The guitar must now be given time for the lacquer to cure. This will be about three to four weeks. After this, final sanding and buffing. In the mean time I will begin to build the tailpiece and bridge.
Saturday, April 10, 2010
Spraying The Rufus
In the spray booth working with The Rufus. I decided to add a mix of golden and dark brown tints to the lacquer to give the guitar a soul-glow. It was too bright before. Looking really nice now. Once again, the sound track for this short film was created with a Mac, a synth and a guitar.
Thursday, April 1, 2010
Marshwood Acoustic, Chapter 4, The Body
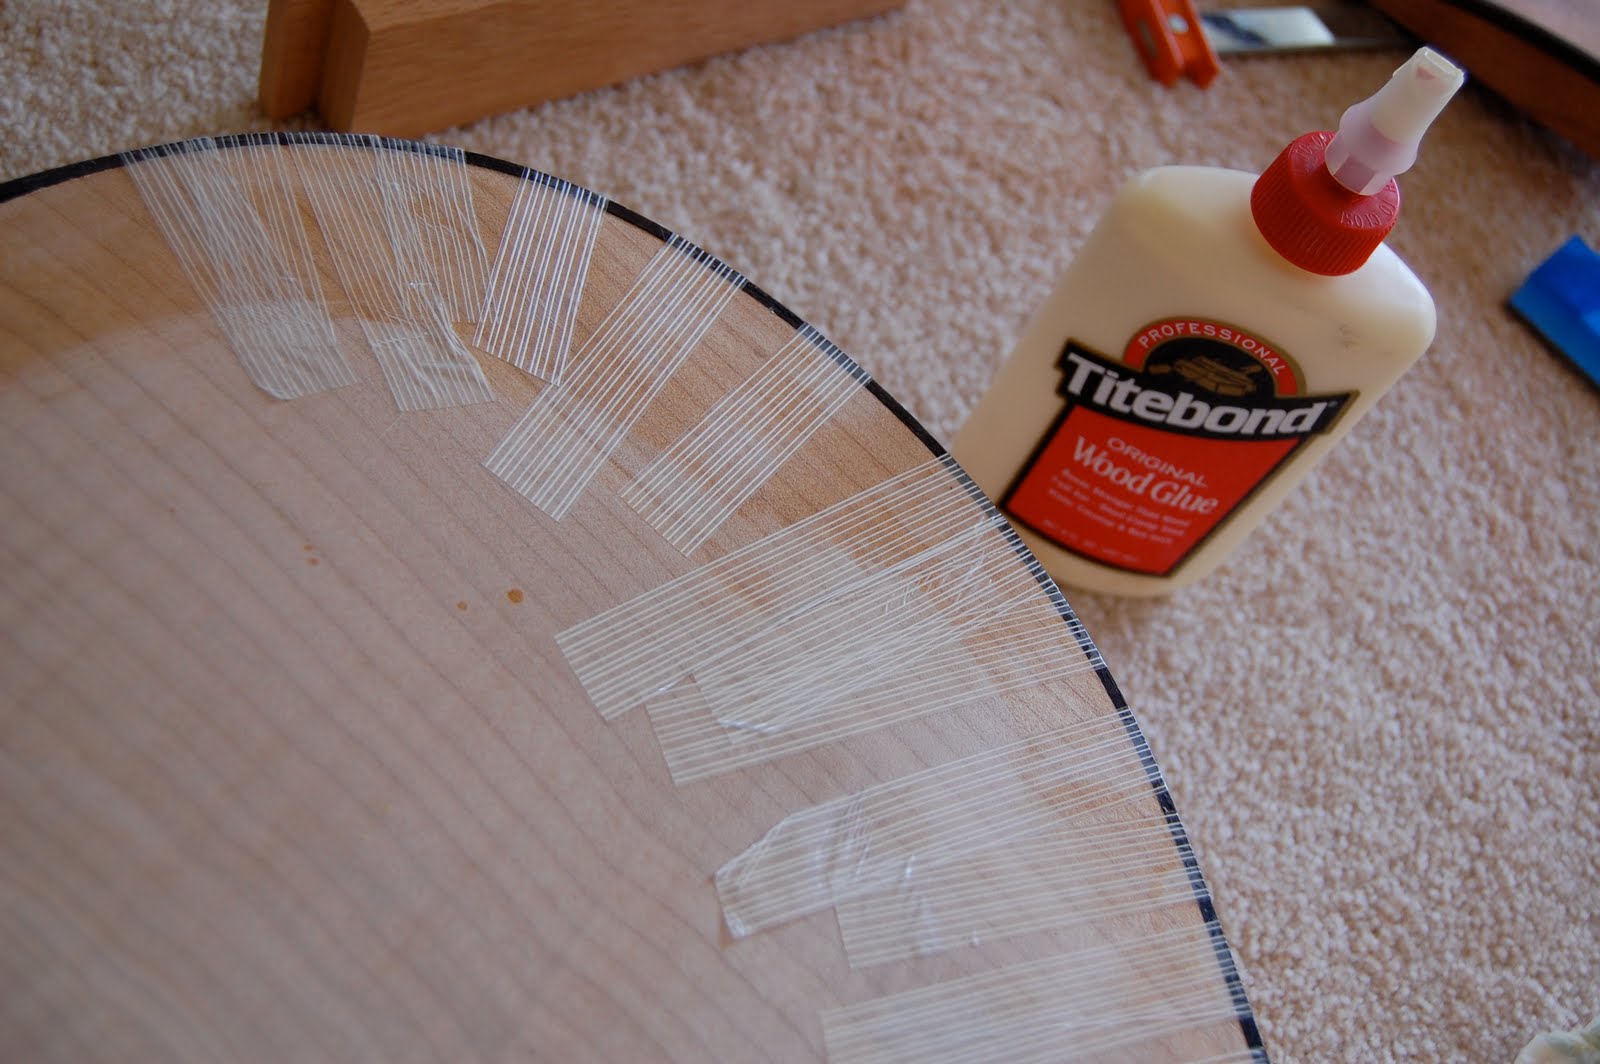
The rosewood bindings have been added to the body. Bindings are thin strips of would which act to cover the joints of the top/back plates with the sides of the guitar. Here is the gist of it: 1. I bent the wooden bindings with heat and steam in a bending-jig (picture). 2. A laminate trimmer was used to route a channel along the sides of the body. This channel will accommodate the binding. 3. The binding was glued in using filament tape to hold it down (picture). 4. The end results are pictured here. The next step will be to sand the binding flush with the body.


Saturday, March 27, 2010
The Rufus, Pore Filling
Using an oil-based pore filler I have officially begun the finishing process on The Rufus. The three pictures show the dramatic effect this filler has on the wood. Before beginning, the wood seems dull and lacking personality.

The filler compound was applied with a small brush then wiped off with a cloth. It will take several applications in order to fill the pores.

Pictured here is what the wood looks like with three coats of filler. It is really beginning to come alive. The effect will become even more complex when lacquer is sprayed onto the guitar.


The filler compound was applied with a small brush then wiped off with a cloth. It will take several applications in order to fill the pores.
Pictured here is what the wood looks like with three coats of filler. It is really beginning to come alive. The effect will become even more complex when lacquer is sprayed onto the guitar.

Wednesday, March 24, 2010
The Rufus, Final Sanding
For the past two weeks I have been sanding The Rufus. Mahogany has very open pores. The two pictures show the pores of this wood. They don't look like much, but when it comes to applying lacquer they have gorge-crater-ish quality. Pores have to be filled in order to create a level surface for the lacquer. I have tried two methods and was not happy with the results. So, I came across a product the other day which will do the trick. Saturday I will begin the finishing process by using this filler.


Friday, March 19, 2010


Sunday, March 14, 2010
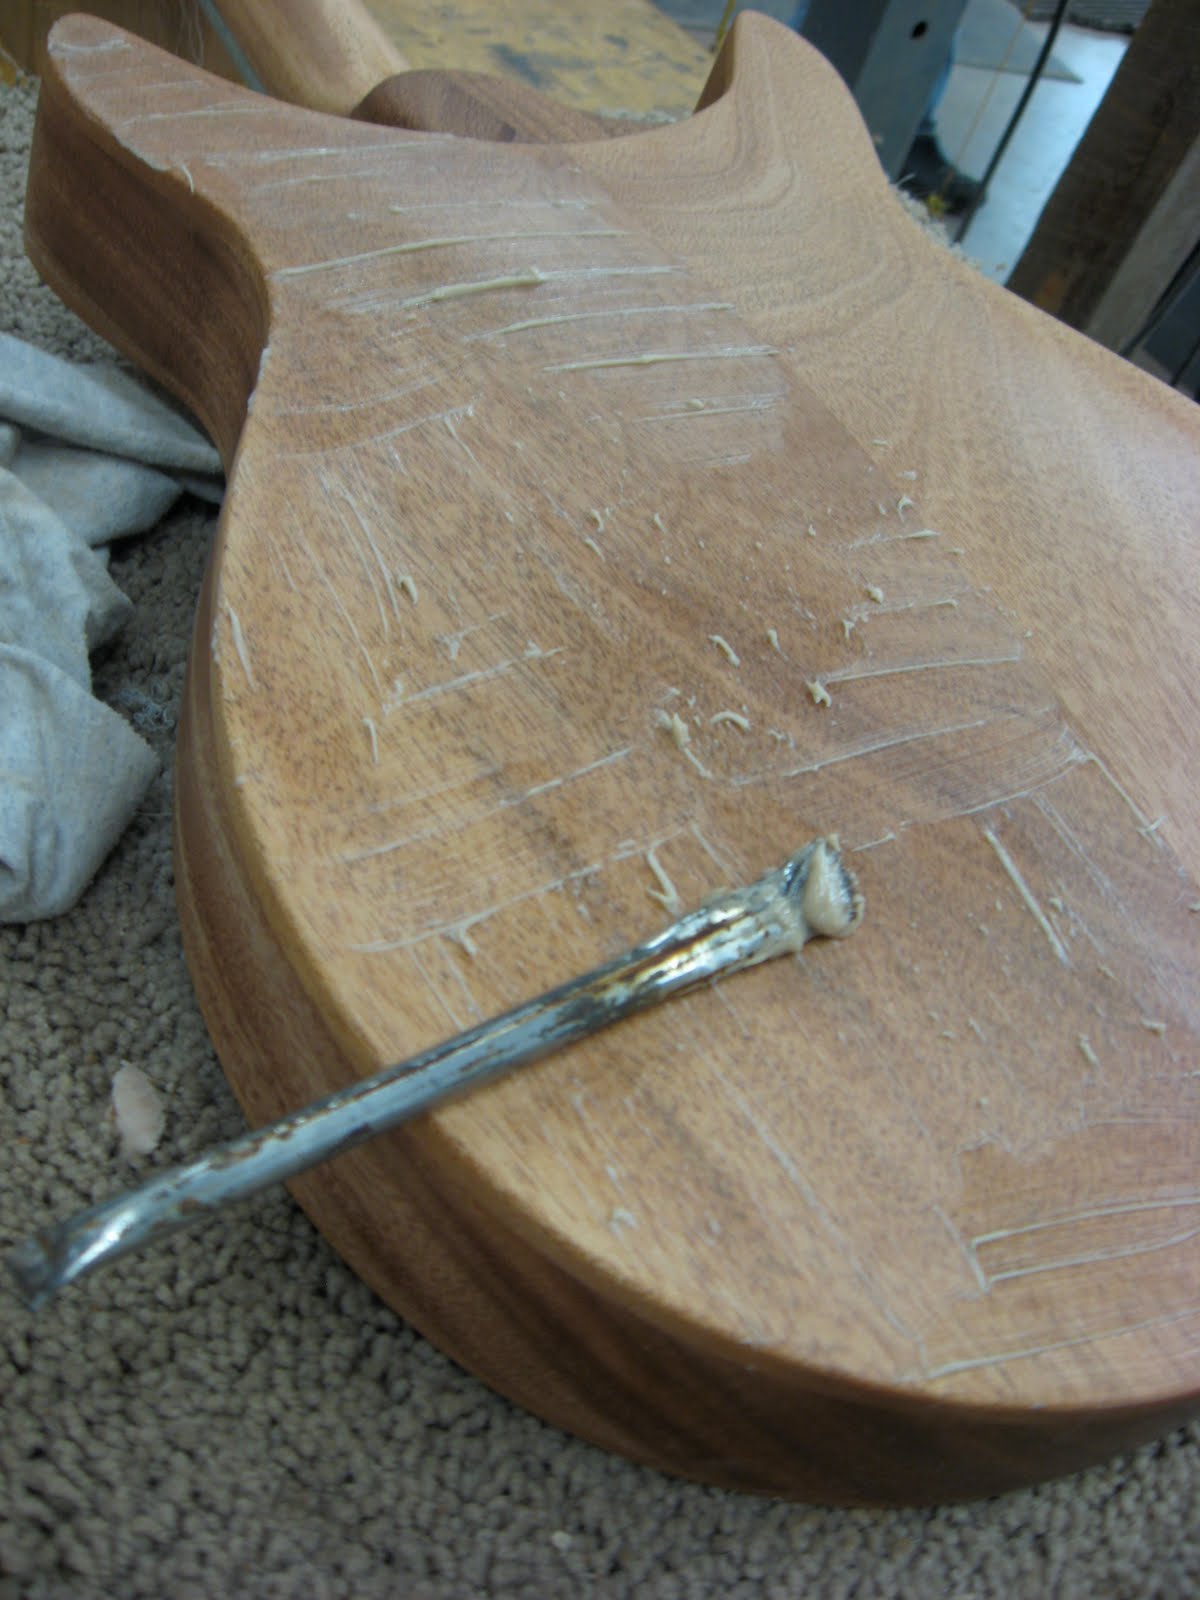
The Rufus, Shaping the Heel


Rasps, files and sandpaper are what one needs to blend the neck and the body of the guitar together. The idea is to make it ergonomic for the player's hands. Which, will be Dr. Rufus.
Subscribe to:
Posts (Atom)